Visible Dust Review | Cleaning Your DLSR Sensor
Visible Dust is a Canadian based company that produces and distributes a complete professional DLSR sensor cleaning system. Their products are the bomb! I’ve gotta thank Mosse Peterson for his earlier post and video about Visible Dust. Also, Marcus Bell who mentioned the Arctic Butterfly….didn’t know what it was or what it looked like, but knew what it was for. I was intrigued.
Even though my Canon 1D Mark III has an oscillating sensor {technology that vibrates the sensor at a high speed during start up and turn off that shakes dust of the sensor}, there are times when a small piece of dust or dirt gets adhered to the sensor and the shaking just won’t get rid of it. When this happens you’ve got two choices: 1. Send your camera body into the dealer for a cleaning, or, 2. DIY. Option #1 is not too convenient. I opt for option #2! For me to head down to the Canon Service Center in Irvine for a sensor cleaning… its about a 2 hour event. For shooters that don’t live anywhere near a Nikon or Canon service center, it could be problematic. For DIY’ers, you have two choices: 1. Use a manual Air Rocket or air blower. 2. Use canned, compressed air, available at Staples, Office Depot or Radio Shack. Canned air can be dangerous. I’ve been using it for years without any “events.” But, unless you’ve used canned air before, its not advised, unless you’ve seen someone else do it and they’ve showed you how its done. Using compressed air incorrectly, could cause permanent damage to your sensor.
Using Canned Air: Make sure that the air can is used upright and in a level fashion. If you turn it sideways or invert the can, it will release brain freezing moisture and totally screw up your sensor. Release some of the contents first in small, short bursts to make sure that any moisture is expelled {The freezing mist is due to the contents being under pressure}. Using small short bursts of air …. about 2-3 bursts to clear the sensor. Just make sure that no moisture is coming out of the nozzle.

Can’t Imagine Life as a Professional Photographer Without Visible Dust
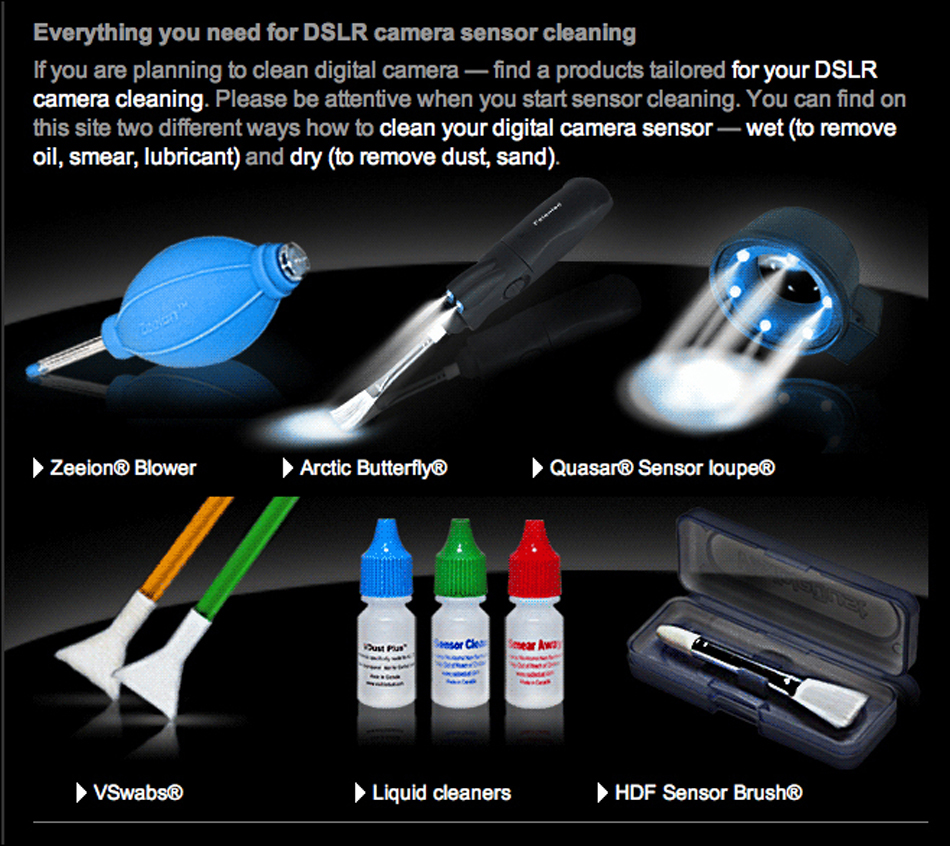
Seeing the Dust |Visible Dust Sensor Loupe® 7X
I’m a big believer in owning product and gear that makes my life easier. Part of my ritual before every wedding that I photograph is to scope my sensors with my Visible Dust’s Sensore Loupe ® 7x. The loupe looks a bit like a flying saucer. Its basically a loupe/magnifying glass with a bunch of LED lights built into the the bottom of it and fits directly over the lens opening on your camera body. The LED’s flood the sensor with light and you can clearly see the smallest particle of dirt, dust or a stray micro hair on or near your sensor. I’ve owned their Loupe for over 3 years and have not had to replace the battery yet! Found a piece of dust on your sensor…. move on to the next step….
Sweeping Off the Dust | Arctic Butterfly® 788 {with light}
An essential component to my Visible Dust kit is the Arctic Butterfly. After you use the sensor loupe you use the Arctic Butterfly to remove dust from your DSLR sensor. The battery operated brush has 3 built in components: 1. A detachable and replaceable fine white brush attached to a silver shaft and an LED light so you can see your sensor when using the brush. This is how it works… it’s battery operated motor and shaft with a three position switch on the handle. When you turns on the motor it spins the shaft and brush at a high speed creating a negative charge that attracts dust to the brush….very clever! The Arctic Butterfly comes is a slim and easy to pack traveling case for on location or destination shoots. But what do you do if you have a smudge or a stubborn piece of dust that just won’t come off your sensor easily?
Sensor Cleaning Swabs and Solution | Ultra MXD-100 (Fabric) Sensor Cleaning VSwab®
When I first started shooting digital, the caveat was never, ever do any cleaning of your DSLR sensor by yourself. It was like one of those disclaimers: “Don’t try this at home. These stunts are all done by professionals.” Well that’s all nonsense. Visible Dust provides a complete solution for cleaning your DSLR sensor. They offer a range of swabs, just make sure you purchase the correct size for your sensor, depending on your sensor size of crop factor. For instance, my Mark III and 5D each have a different sensor size and I use different sized swabs for each.
How to Use the Swabs: Before using the swabs, use your Arctic Butterly to remove any stray dust particles. Apply 2-3 drops of sensor cleaning solution to only one side of the swab. Let it air dry for about 30 seconds or so, just enough time to be absorbed by the swab and evaporate a bit. Using the moist side, drag it over the sensor lightly, repeat again. Then, using the “dry” side, lightly drag it across the sensor to “dry” it. If you don’t swab with the dry side {like i did the first time i used the swabs} you’ll end up with a streaked sensore {and a panic attack!}. Not to worry, just repeat the three steps above and it will be perfectly clean.
Conclusion
From packaging to product, and customer service the Visible Dust products are simply top notch. Their packaging for their loupe and brush implements are made to stand the test of time. The Visible Dust’s Sensore Loupe® 7x comes in a zip up padded pouch, with a lanyard and lens cleaning cloth. The case is a bit bulky but excellent for travel protection. The Arctic Butterfly is housed in a durable shock resistant plastic case with foam padding on the inside. It would be nice if the loupe was housed in a similar case, possibly a round smaller case for travel instead of the square soft sided zip up case. It would make it more compact and protect it better.
On one occasion I needed my assistant to call Visible Dust customer service in Canada. We had just swabbed the sensor {incorrectly} and ended up with a streaked sensor. It was about 45 minutes before a big on location shoot. And after using the loupe to check the cleaning after swabbing I could see that it was badly streaked. Can you say user error! If I would have watched these videos, I might have gotten it right the first time! Customer service was great and walked me through what I’d done wrong. I neglected to dry the sensor after swabbing it. To remedy the situation, I tried cleaning it 3 more times and used a bunch of swabs. After customer service walked me through a quick fix, they said they’d send me some extra swabs in the mail. No charge. Sure enough a few days later a new pack of swabs showed up in the mail box. Now that’s customer service!
Where to Purchase Visible Dust
You can purchase each piece separately or as a kit. Adorama and B&H sell them as kits and so does Visible Dust. Sure they’re expensive. But what’s the cost of time and gas or shipping to get your DSLR sensor professionally cleaned. Or the time you’ll spend cloning and stamping a pesky dust spot on a few hundred images. As a professional photographer I like start each shoot knowing that my sensor is clean and dust free. Can’t imagine doing a studio session, wedding or family session without using my Visible Dust’s Sensore Loupe® 7x to check and see that my sensor is dust free.


