HOW I SET UP MY a7RII FOR REAL ESTATE & ARCHITECTURAL PHOTOGRAPHY AND WHAT GEAR I USE
USING AN a7RII FOR REAL ESTATE PHOTOGRAPHY
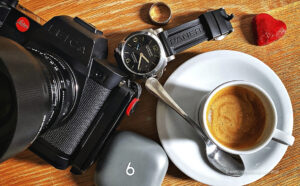
I’d like to share a detailed explanation of how I set up my a7rII for real estate photography and what gear I use. When I first started out in real estate and architectural photography, I used an 11 megapixel DSLR and two lenses: a 24-70mm and a 16-35mm, both with red rings on them. The DSLR and the two lenses did the job. But I wanted more. More megapixels, better lens choices, and tilt-shift glass with focus peaking and an EVF to see what my real exposure would look like. Three years ago I sold my DSLRs and a boatload of L – glass and embraced Sony mirrorless. I havenât looked back since.
I feel like I have the perfect setup for me. For my architectural and luxury real estate photography I use the manual focus, Canon TS-E 17mm f/4L Tilt-Shift lens coupled with a Metabones IV adapter.  Sure you can buy a cheaper adapter for $100, but you wonât get the same results. Youâll get internal lens flare. When you are photographing with a camera body and lens that are both state-of-the-art, it doesnât make sense to cheap out on the adapter. Just pony up the $400 and be done with it. The Metabones IV is a solid piece of gear. With the Metabones, I can put the 17mm T/S on my a7RII and capture stellar 42.4 megapixel images that are razor sharp without guessing about focus. Itâs all about the focus peaking, which Iâll get to in the camera settings below. Hereâs the cool part: Take the same lens and adapter and mount it on the a6300 or a6500 and now you have a 25.5mm lens. The a6300 and a6500 cameras have an APS-C chip on board and output 24.2MP files. Due to the crop factor, a 1.5x magnification, the 17mm T/S on the a6300/a6500 is really close to a 24mm T/S. Itâs like getting two T/S lenses for the price of one!
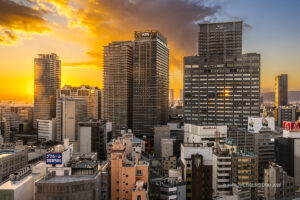
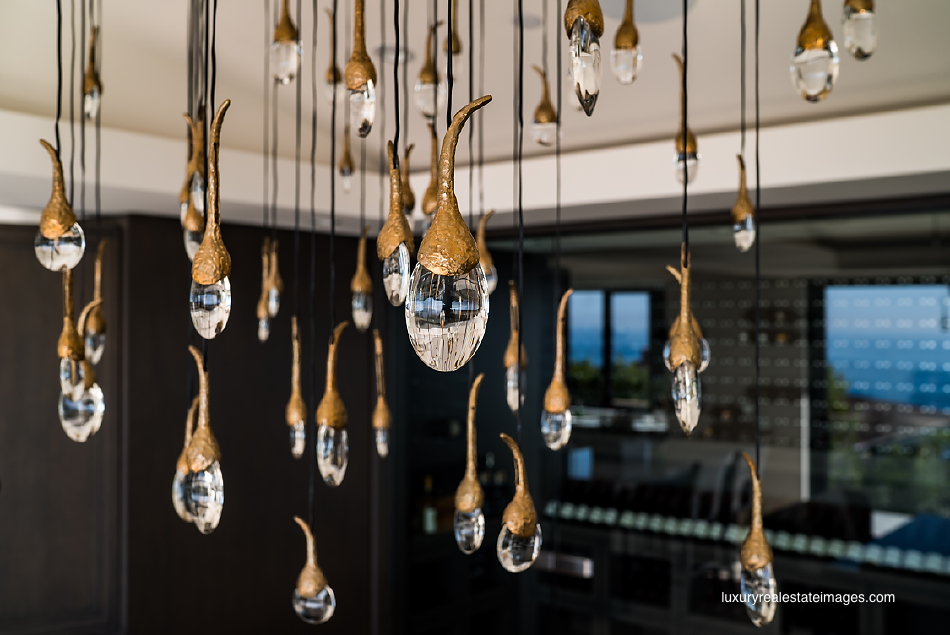
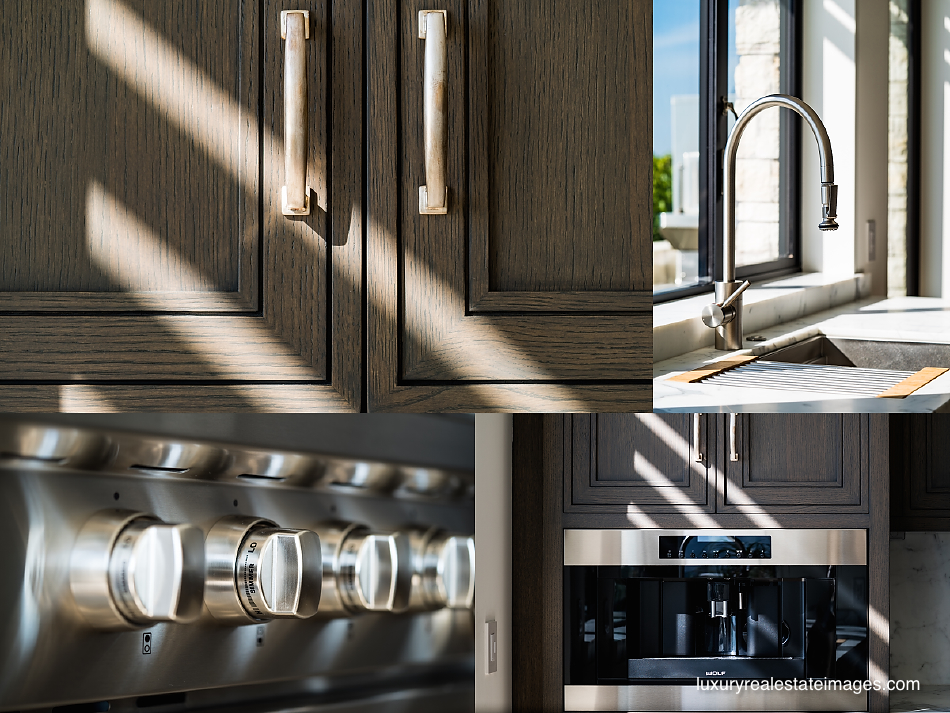
Additionally, I take along the Distagon T* FE 35mm f/1.4 ZA, FE 24-70mm f/2.8 GM for architectural shots when a T/S is not necessary. The FE 70-200mm f/2.8 GM OSS is perfect for out-the-window view images and scene-setting images of the surrounding environment or for photographing people in an architectural environment when I need to add a little bokeh to the mix. And finally, the FE 90mm f/2.8 Macro G OSS [tack sharp wide open at f/2.8,] with very pleasing bokeh, is stellar for architectural and design detail shots.
Camera Settings I shoot in RAW mode, compressed. Below are screenshots. They are shown in the order the icons are listed when depressing the Menu button on the top left, back of the camera. Similar settings can be used on the a7sII, and a6300 which I also use for my real estate photography. The exact position of menu items varies on the different camera models.
Here’s how I set up my Sony a7rII for architectural photography and luxury real estate photography â¦.
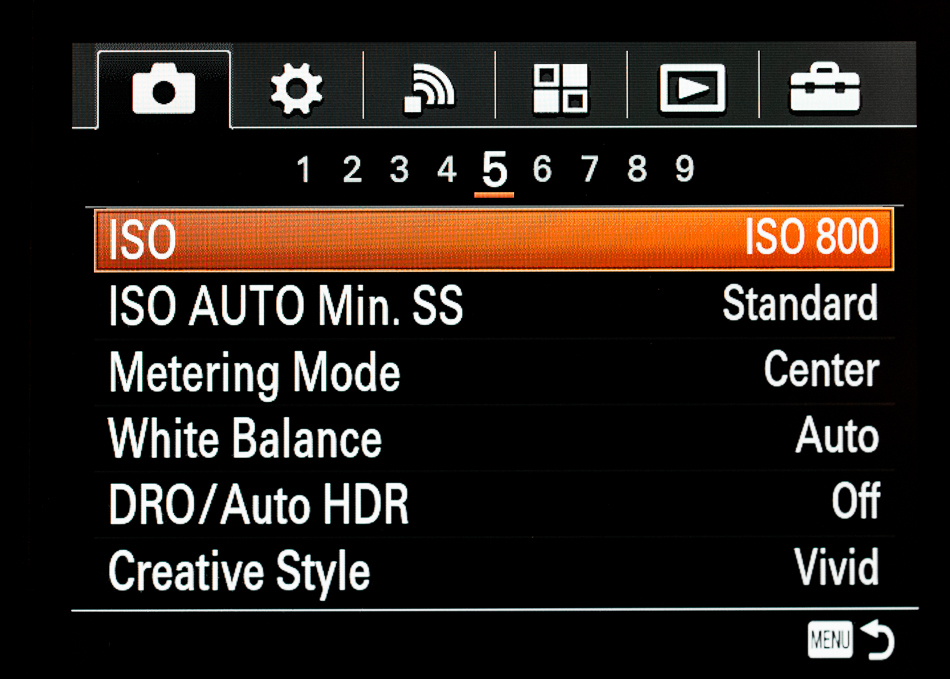
ISO -Â Camera icon > 5 Â > ISO
When shooting casually or street I choose Auto ISO. But for all my architectural and real estate photography I lock in an ISO. Iâm photographing anywhere between 100 and 800 ISO on my a7RII. ISO can be accessed through the Menu, the Control Wheel, or from the Fn menu.
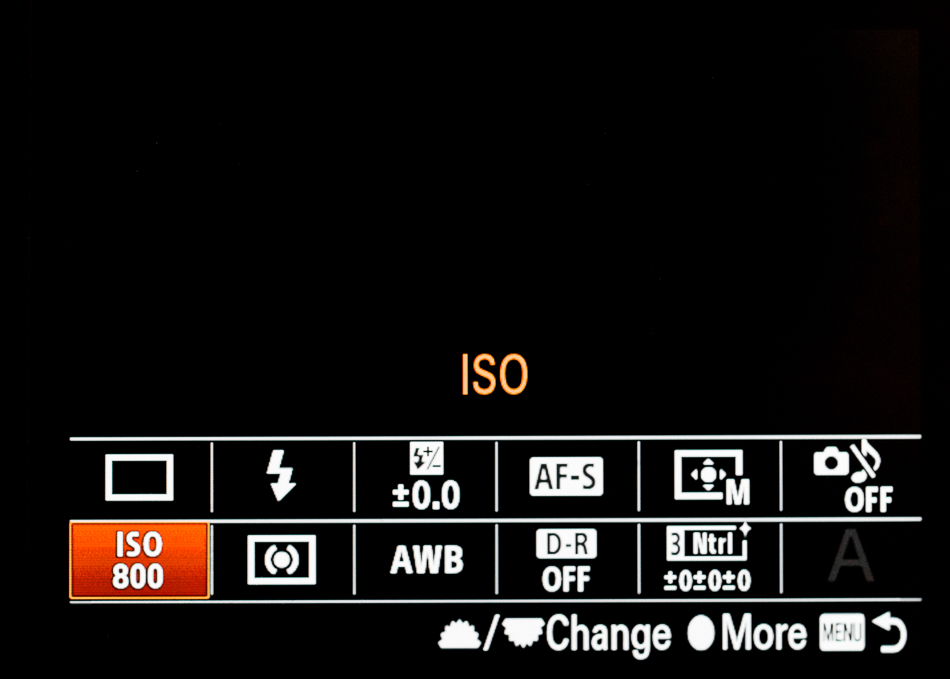
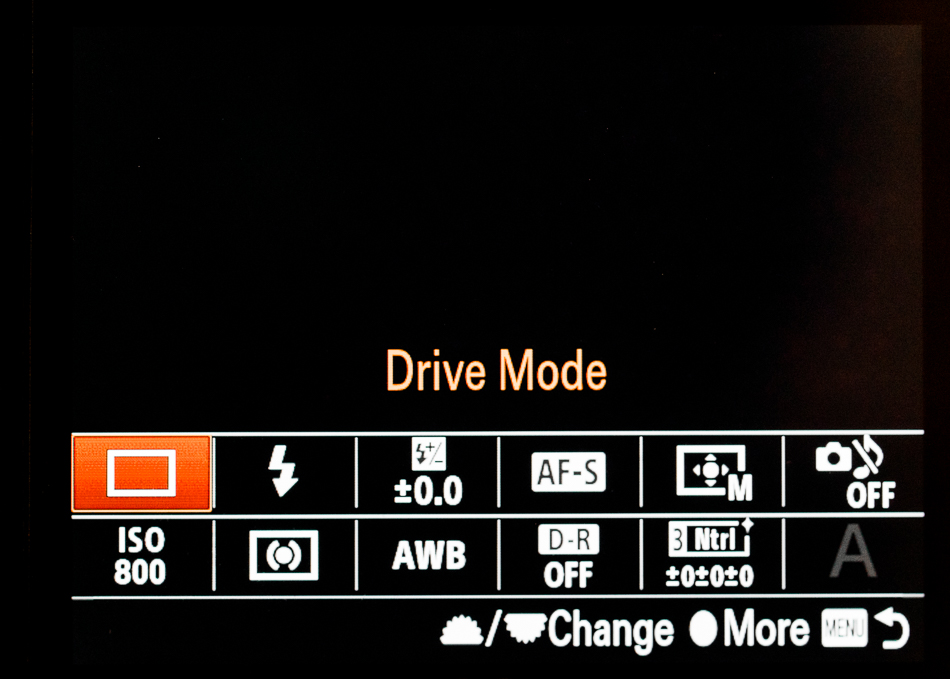
The screen shot below is displayed when pressing the Fn button. Â I’ve set up my Fn screen for my commonly used camera settings. Â When I first switched to Sony it took me a couple of months to get really comfortable with the menu system. Â Some things weren’t obvious to me at first. The Fn screen allows to me to access my most commonly used functions without menu diving.
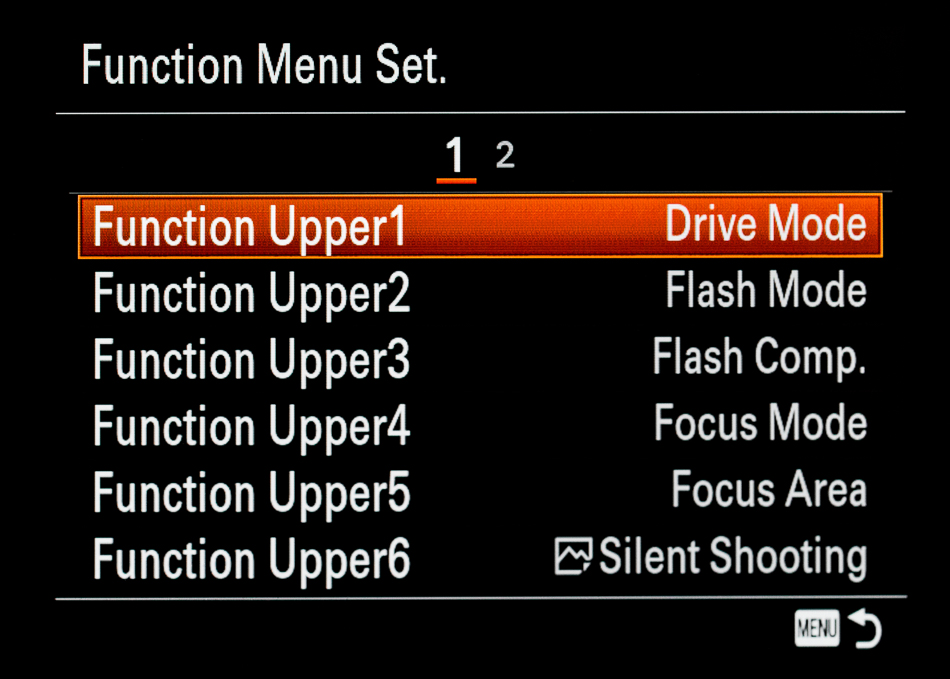
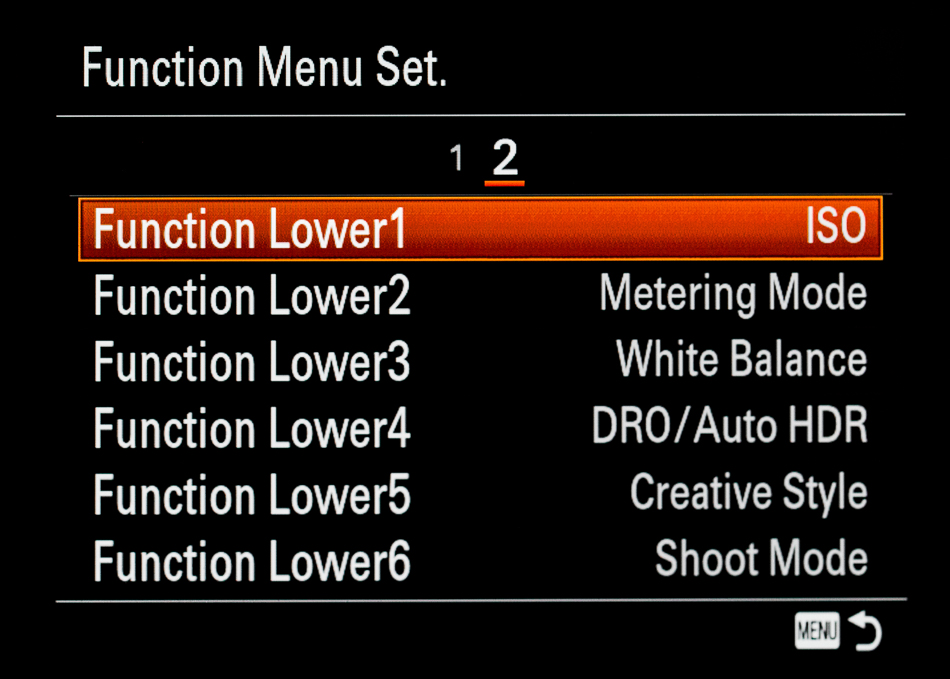
Function Menu Set
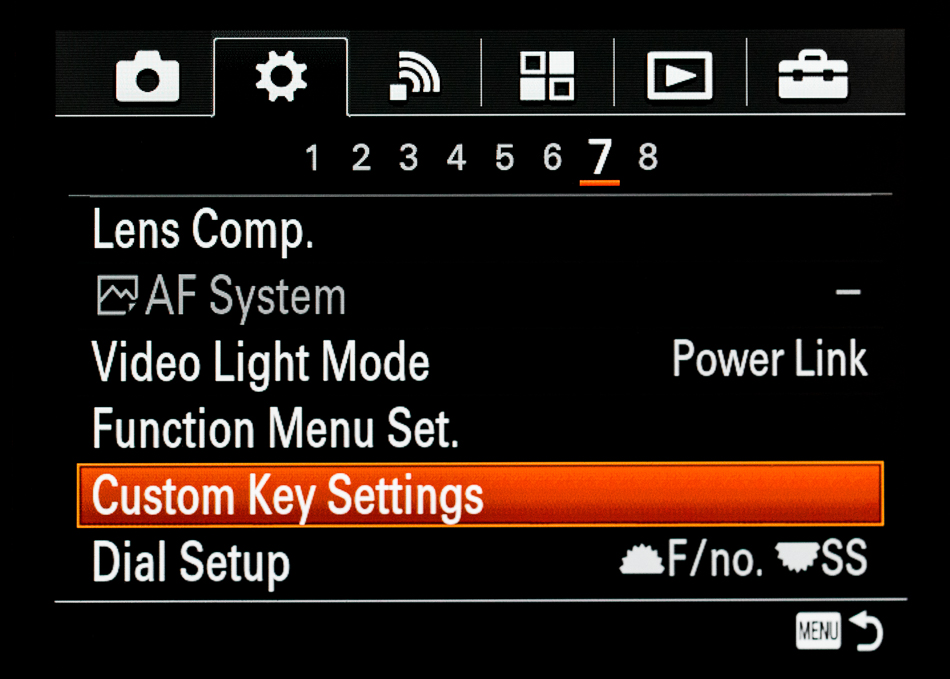
How to access the Function Menu Set: Â Gear icon > 7 > Function Menu Set
Here a look at how I’ve set up my Fn button screen. It’s really important for me to feel comfortable with my gear. Â And customizing it as much as possible to fit your personal shooting style will help you be fluid in your photographic approach.
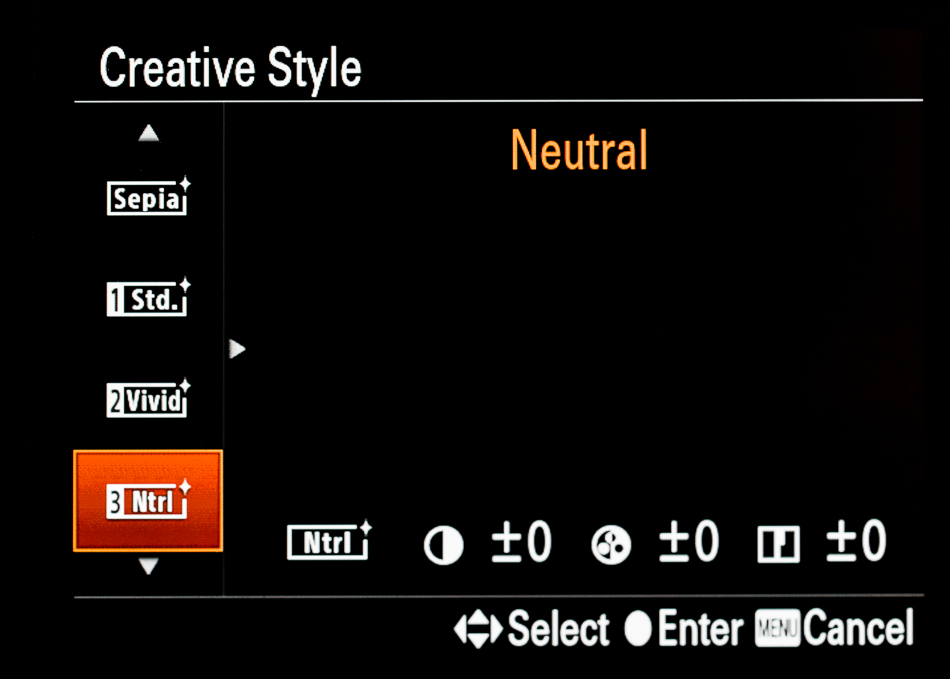
Creative Style
Creative Style can be accessed two ways.
Camera icon > 5 > Creative Style
Or from the Fn Menu
I’ve heard from the people at Sony that the Creative Style: A color preset if you will that is applied to the image and is supposed to works only with Jpegs.  However, I find that it works perfectly with my RAW images.  I believe that Adobe Photoshop CC does something to bind the preset to my RAWs.  Below is how I use Creative Style.
- Vivid: Outdoor shooting. I like the color bump in the green landscape and blue sky.
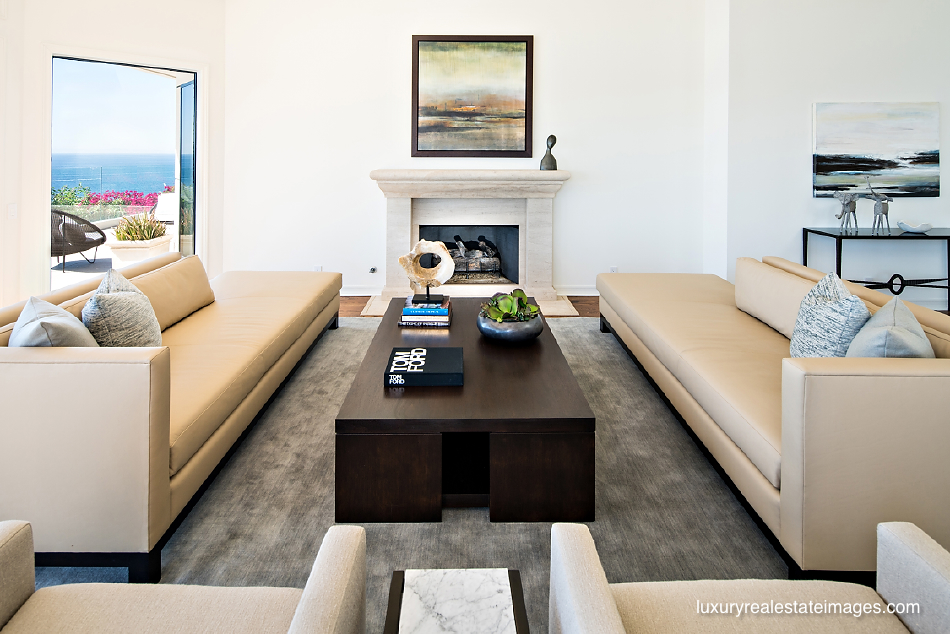
- Neutral: Interiors. Always on Neutral.
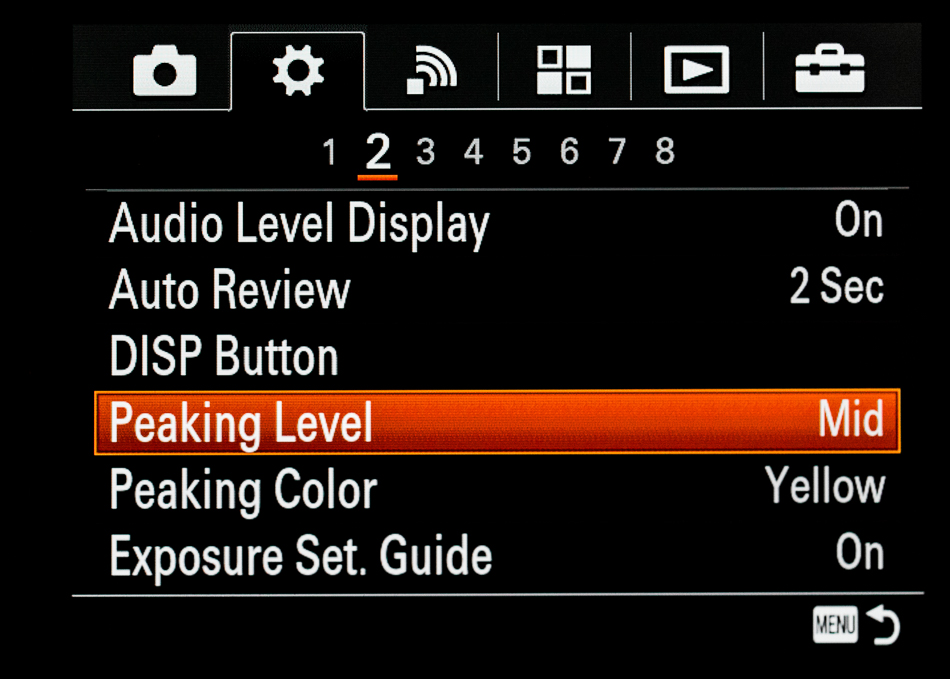
Focus Peaking
Gear icon > 2 > Scroll down to Focus Peaking Level and  Peking Color
Focus Peaking highlights the area in focus in the color you choose in the menu system.
⢠Peaking Level set to Mid.
⢠Peaking Color is set to Yellow.
The Canon 17mm T/S is a fully manual focusing lens, which is easily focused accurately with focus peaking. I find Yellow is more easily seen, rather than Red or White.
Exposure Compensation
Gear icon > 8 > Dial Setup ⢠Dial Ev Comp Set to Front Dial
I’ve set up my exposure compensation to the front dial, located below the shutter button.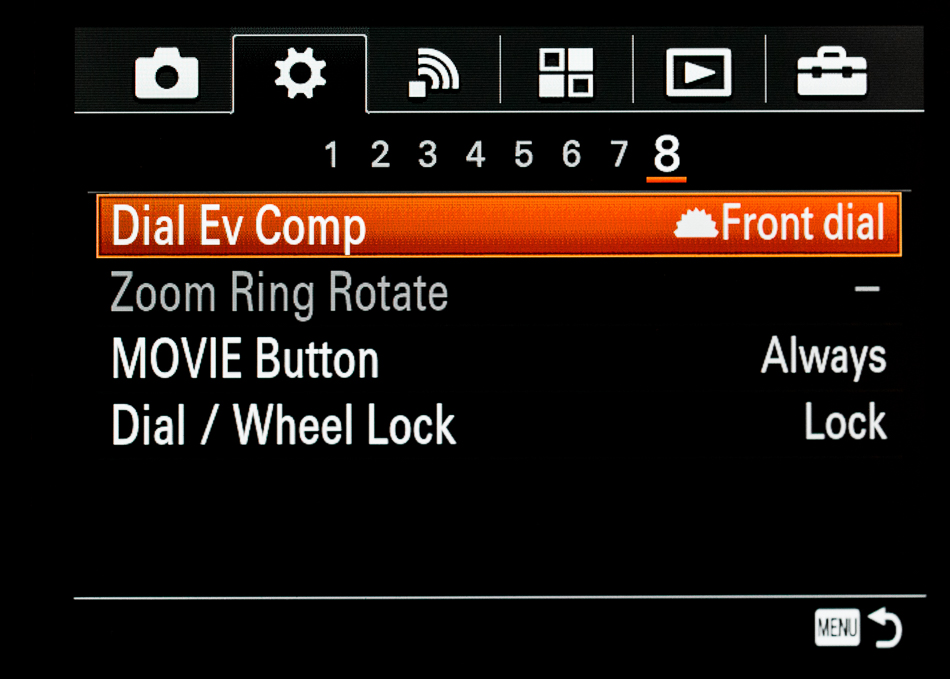
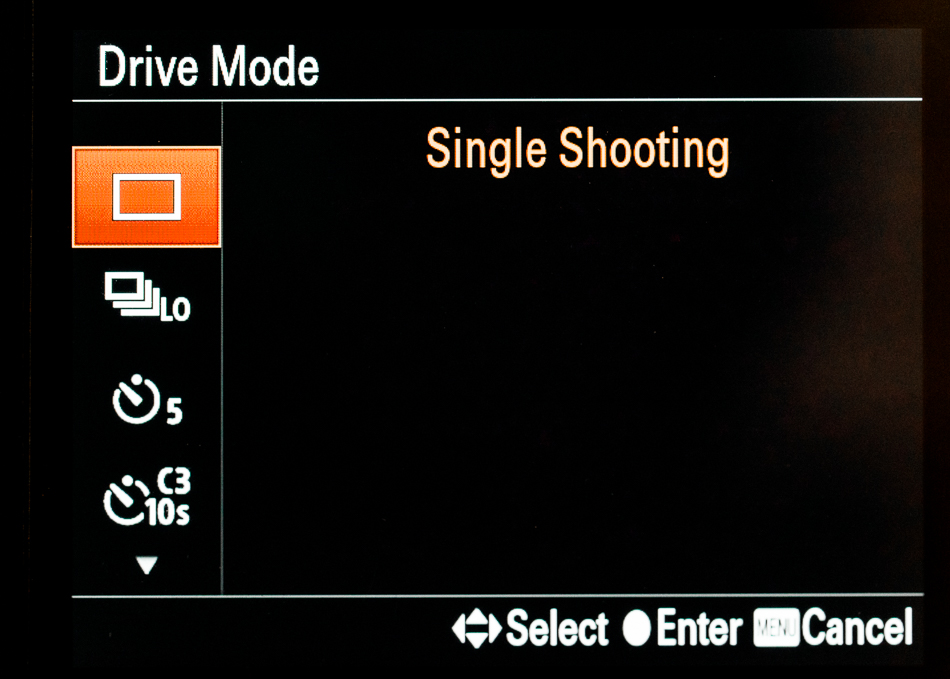
Focusing System for Auto Focus Lenses
Single Shot for architectural settings, Â interior and exteriors. There is no need to over shoot at a higher frame rate. Drive mode can be accessed one of two ways: Â Camera icon > 2 > Scroll down to Drive Mode, or through the Fn button on the back of the camera.
Bracketing
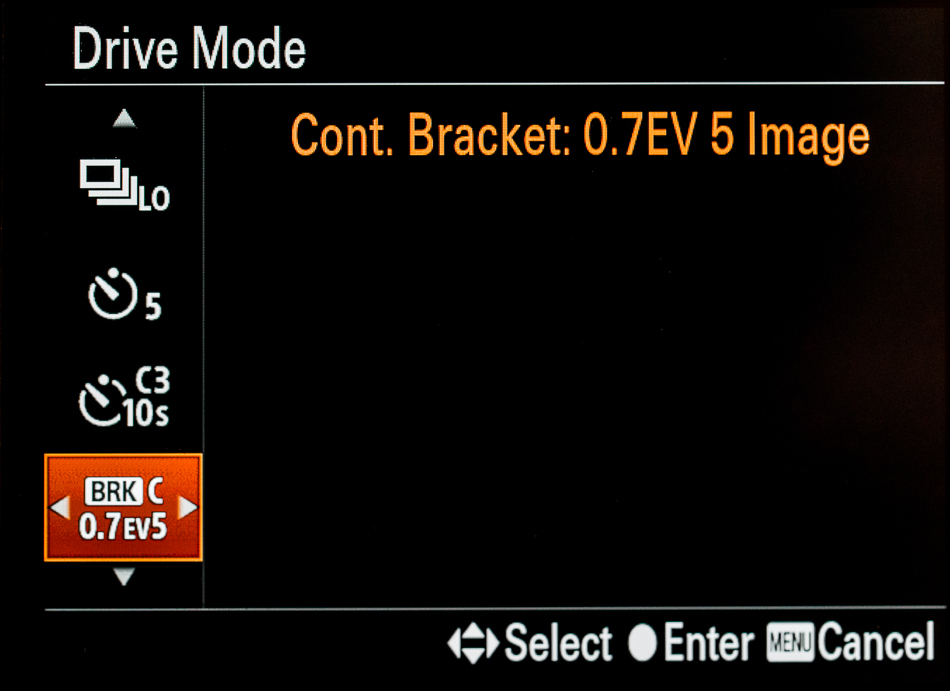
Camera icon > 2 > Scroll down to Drive Mode, then click the Center Button to choose Drive Mode, then use the Outer Dial to toggle left, right, up or down. Similarly, the Fn button can also be used to access bracketing through Drive Modes. Â See the upper left box of my Function Menu Set above.
HDR: I use some High Dynamic Range bracketing techniques using the following setting: BRK C 0.7 EV 5 = Bracketing 0.7 Stops apart over 5 frames. The âCâ stands for continuous. Continuous mode keeps tripping the shutter until all 5 brackets are completed. All you need to do is keep the shutter button depressed. If you shoot in BRK S 0.7 EV 5: âS,â means you will have to press the shutter each time for each bracketed image. âCâ mode automates the process. Whether you are simply using the shutter or the Sony RM-VPR1 remote control, or the cameraâs shutter button. Iâve found that rather than bracketing at 1 stop increments, a tighter tolerance of BRK C 0.7 EV 5 gives me a wide enough dynamic range to get all the information needed. There are times when I do use BRK C 1.0 EV 5 for a broader dynamic range, but it’s seldom used compared to BRK C 0.7 EV 5.
Airborne in a Helicopter: Continuous High Drive Mode. This setting allows me to rapidly acquire multiple frames. When photographing from a helicopter there are several factors that contribute to blur. A) Vibration: The rotor is always spinning. B) You are always moving.
Iâve found the shooting at a higher ISO allows me to use a fast shutter speed. And, shooting at fast frame rate ensures that more frames, typically the middle in a series will be sharpest captures. This contradicts my Single Shot method of not over shooting. However, when I’m airborne, and , my clients are paying several hundred dollars per hour for the air time, Iâm definitely going to over shoot. The last thing I want to do is tell mey client that I didnât get the shot and I have to go up again and do it over. Thatâs simply not an option. Iâve found when shooting from a helicopter my camera of choice is either the a7sII or the a6500. Why: The buffers in both cameras, especially the a6500 is huge compared to my a7RII. While I love the resolution of the a7RII my a7sII and a6500 guarantee quicker frame rate acquisition. I find that with the a7RII I can photograph about 4-6 framesâ¦.then I need to wait before the buffer clears to review the images. With the a7sII and the a6500 the wait time is minimal and review is almost instant.
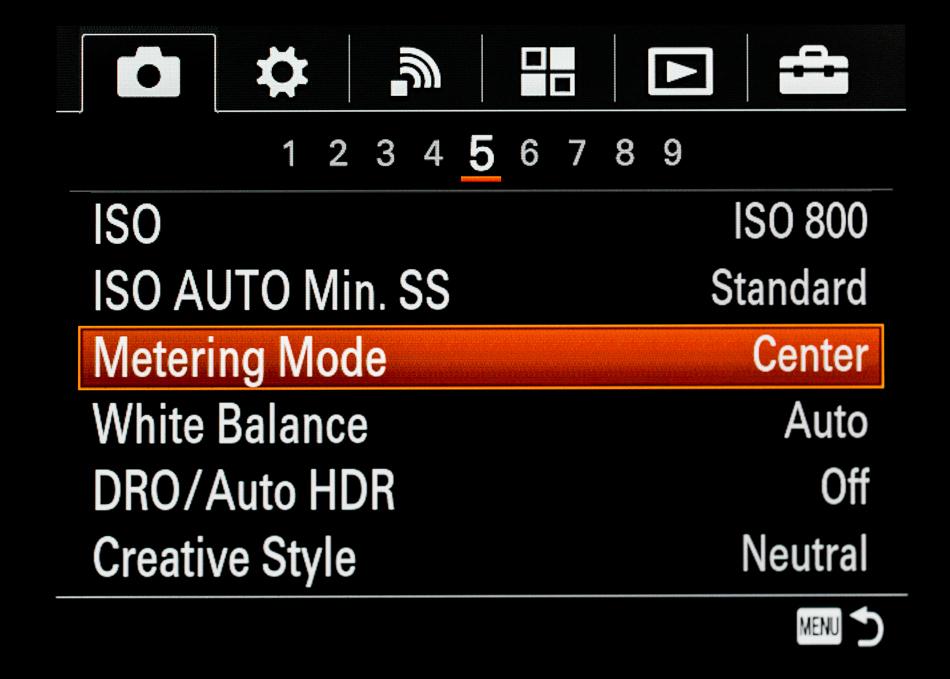
Metering
Camera icon > 5 Center: As in Center Weighted. Just works for me.

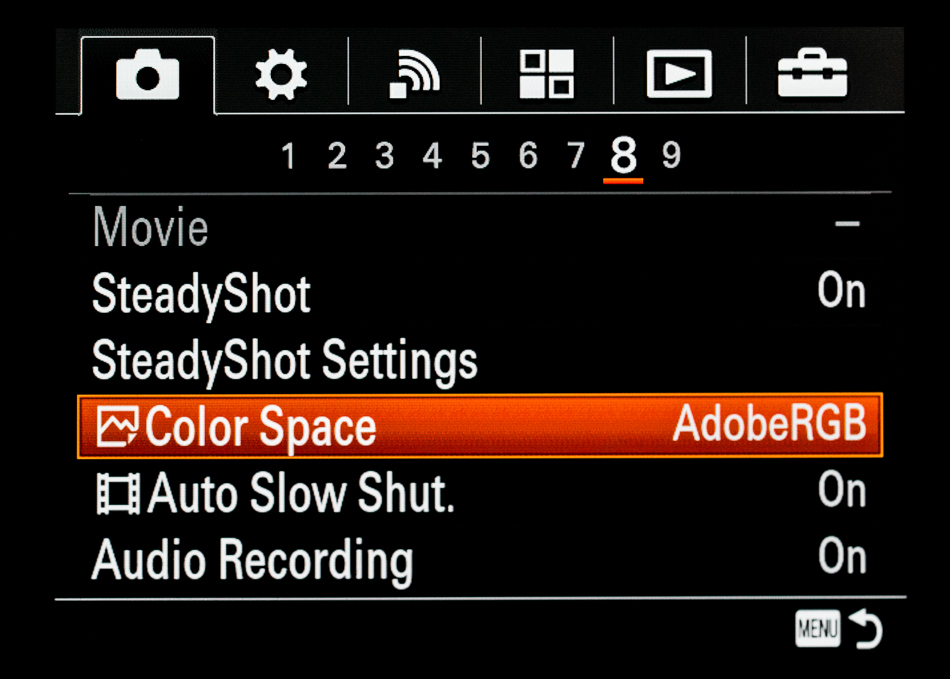
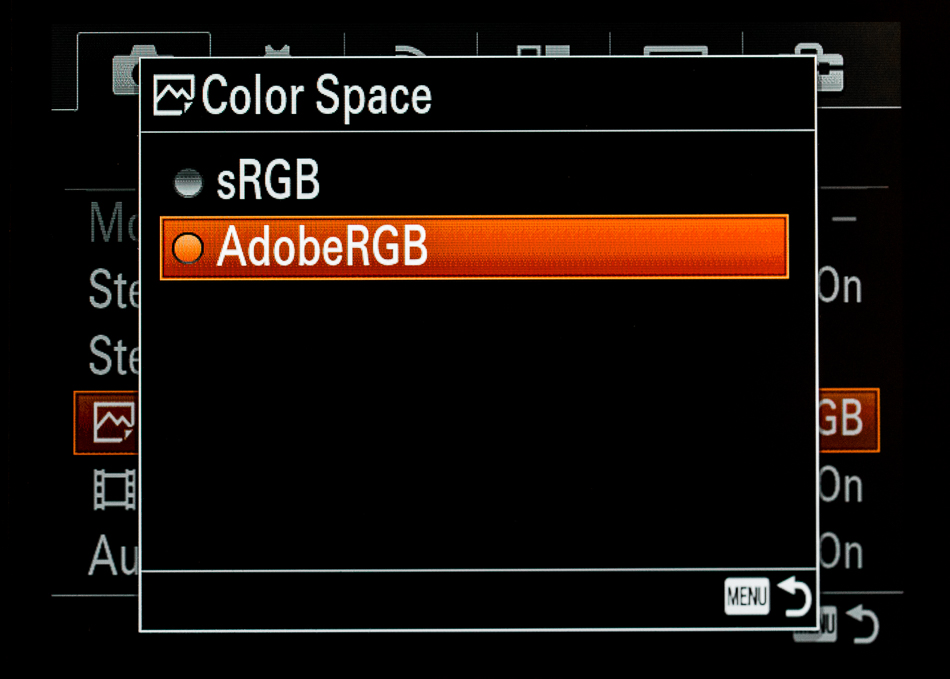
Color Space
Camera icon > 8 > Scroll down to Color Space > Click the Center button and chose > AdobeRGB. Â Accurate color from capture through post production is critical for print and web display. Â Perfect color rendition is even more critical when working with interior designers. Â I’ve found the Adobe RGB is the best setting for me.
 Programming the Center Button & Control WheelÂ
Gear icon > 7 > Custom Key Settings Assigned to the Center Button on the back of the camera.
I’ve assigned the Center Button on the back of the camera to do a few things: Â a) Change the size of the Focus Point: Â To do this simply click twice on the Center Button and use the Control Weel to change the size from Small to Medium and Large. Â b) To move the Focus Point to a selected area within the frame: Â Simply click the Center Button and use the sides, top or bottom of the Control Wheel to position your focus point wherever you’d like.
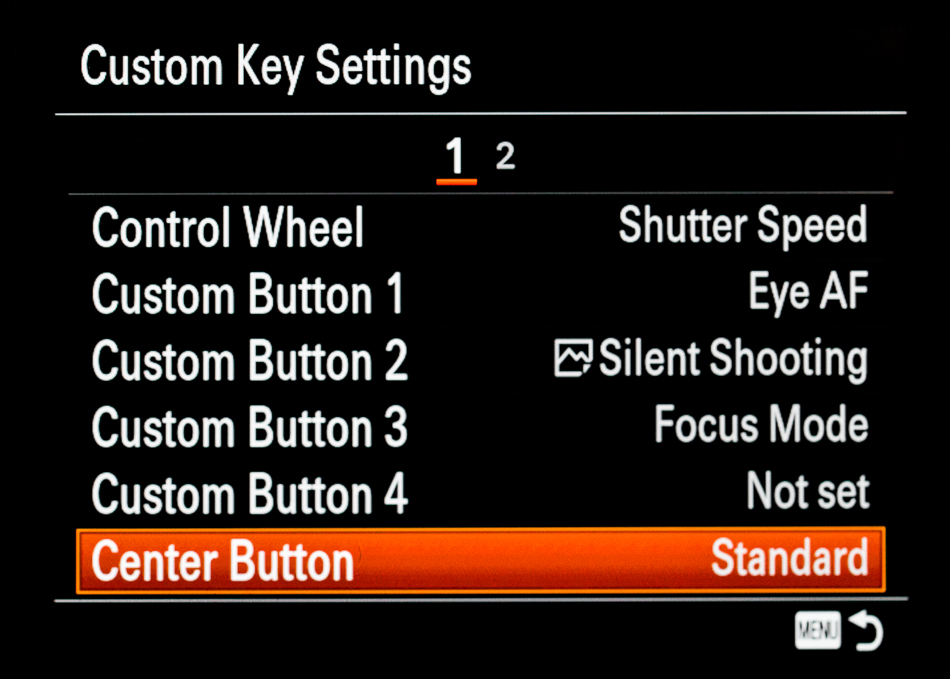
I’ve included both Custom Key Setting screens so you can see how I’ve set up my Center Button and Control Wheel.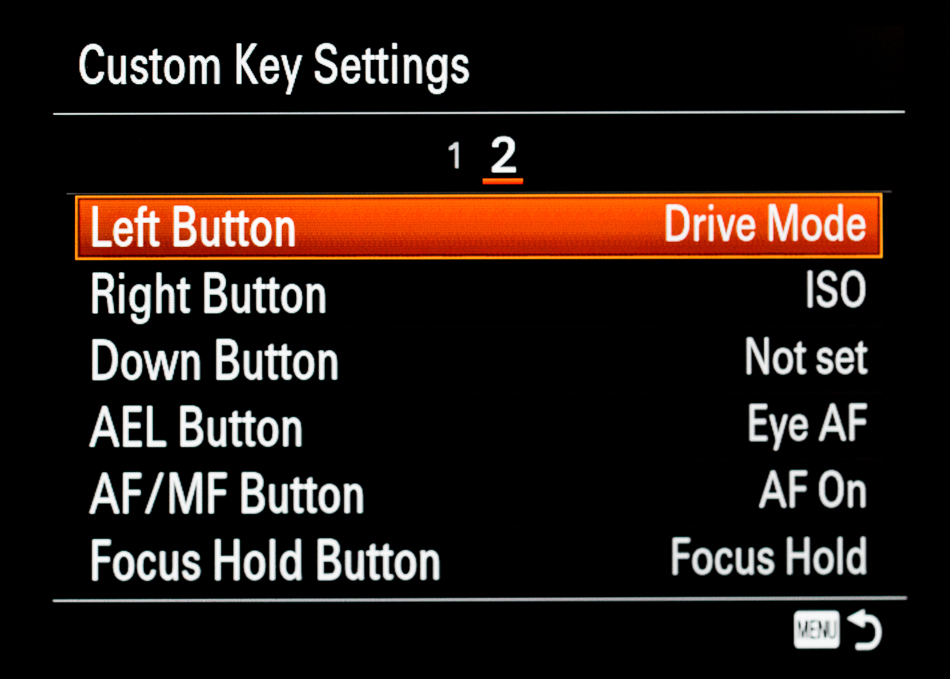
Marc is teaching his next Mastering Luxury Real Estate Workshop Intensive in Palm Springs on May 14th, 15th, and 16th, 2018. In the workshop intensives, photographers learn how to be better real estate photographers, how to work with off-camera lighting, how to composite and retouch, and how to make more money. The workshops are a rigorous 3 days of intense learning and a fun and intimate gathering of attendees from all over the country.