Workflow | Photo Mechanic | LightRoom 4 & CS5
A Fool Proof Digital Workflow System for the Professional Photographer
Having A Fool Proof Digital Workflow System for the Professional Photographer is essential for the professional digital photographer. Heck it’s even useful to the Uncle Fred’s of the world. Below, is a detailed look at the Workflow system we use at our studio. Been doing it the same way for about 10 years now. It takes a minimal amount of preparation with a big pay off in time savings. I’m a huge believer in getting it right at capture. It’s taken me a few years to really tune into light quantity and quality, both available and artificial. After all, photography is writing with light. Purely from a standpoint of capture, if your exposure is dead on, there’s not much retouching to be done. That’s the case for me in portraiture, wedding, pet, food, architectural and commercial photography. Near prefect capture = barely any retouching needed. With that said, its taken more than a few years to create this workflow system. Periodically it’s tweaked, but hasn’t changed much for the last 5 years.
Calibrating Your Monitor
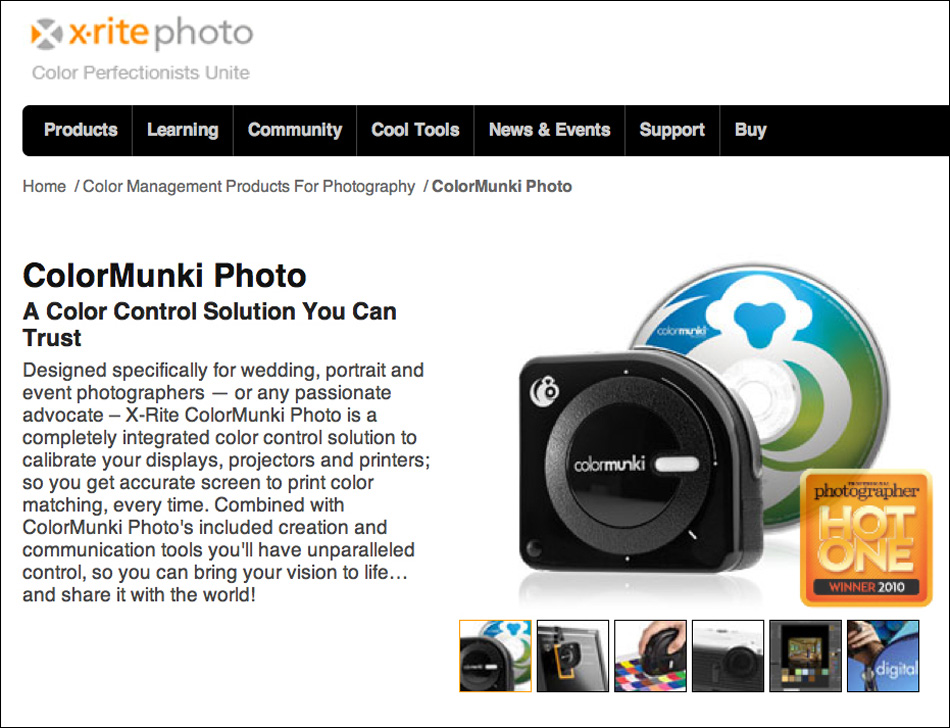
No workflow system would be complete if you are using out of the box color not calibrating your monitors. At my studio we use a older calibration system: the Eye One Match system on my MacBookPro 17″ with a 30″ cinema display. Unfortunately the Eye One Match is not compatible with the Snow Leopard OS (loaded on my 24″ iMac) so I’ll probably change over to the Color Munki in time. That said, make sure that you are using color calibrated monitors. If you are not, you will not be able to get your vision of what the color and density should be for your captures. People often ask me how I get such great color in my photographs. Answer: Start with a correctly calibrated monitor. The Xrite people are great to work with and their customer service is phenomenal.
Updated 10.27.2013 : I purchased a ColorMunki Display sometime ago and love it. Its super simple to use and runs on all my Macs. I’m currently running OS 10.7.5 on all my machines. Mavericks is an unknown and will have to wait.
Folder Hierarchy System
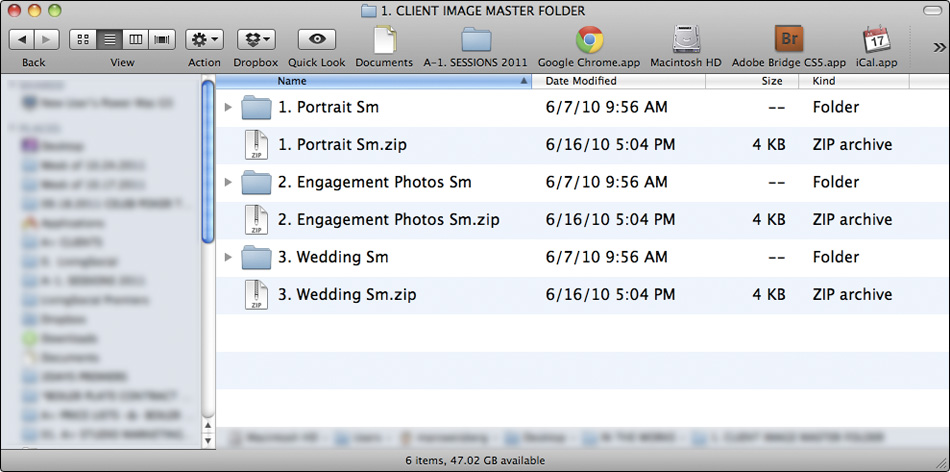
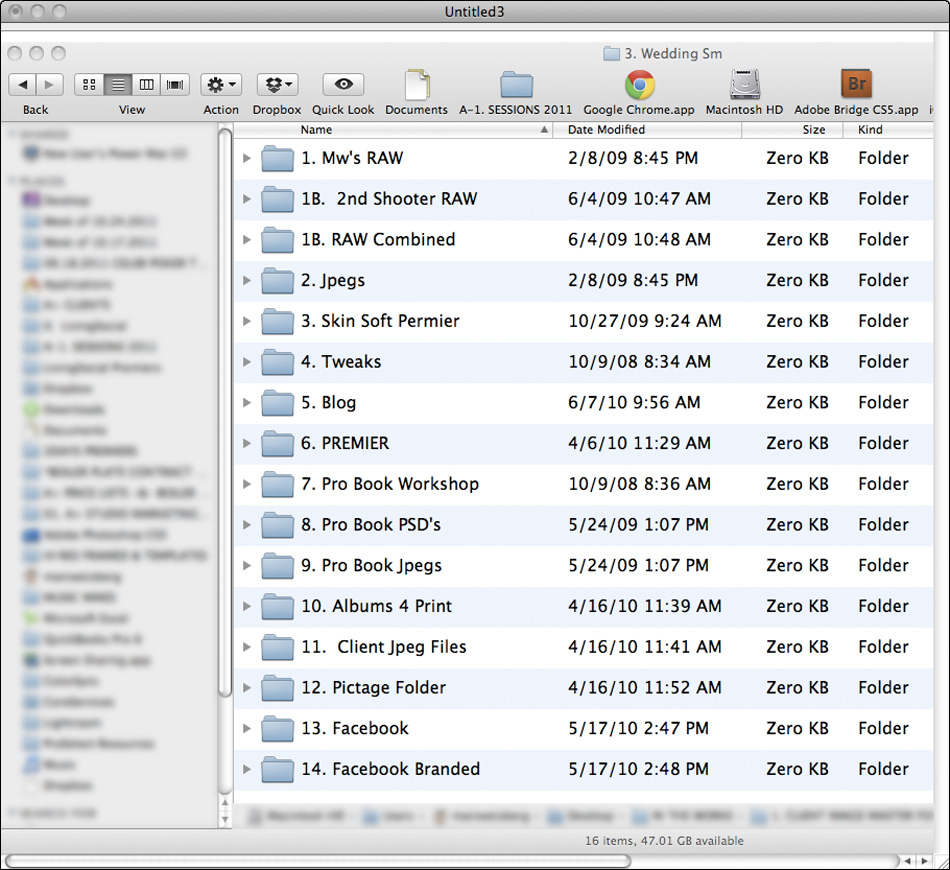
Create a Master folder. At our studio, we’ve created Master folders for each type of shoot that we do: portrait, wedding, family session, commercial and so on. Inside that Master folder you’ll create nested folders. See the screen shots below for our real life examples of a Wedding Master Folder and a Portrait Session Master Folder. Each time we do a shoot, the appropriate folder is copied and re-labeled with the date first and then the clients name: 11.01.2011 Smith Family.
Client Image Master Folder [below]
This folder contains all the empty Master Folders that are used for each shoot or session that we do. The Portrait Studio Master is also used for all our commercial and fashion shoots.
Wedding Studio Master File [below]
Contains all the empty nested folders for a wedding shoot. The digital files will flow from one folder to the next {in numerical order} with each subsequent step of the work flow outlined below. Looks daunting but its not. Most of it is automated with Adobe Lightroom 4x, custom Adobe Photoshop Dropletts and the amazing ProSelectPro software for creating blog posts and all our montages and albums. You can see a review I wrote about ProSelectPro right here.
Portrait Studio Master file [below]
Contains all the empty nested folders for a portrait shoot.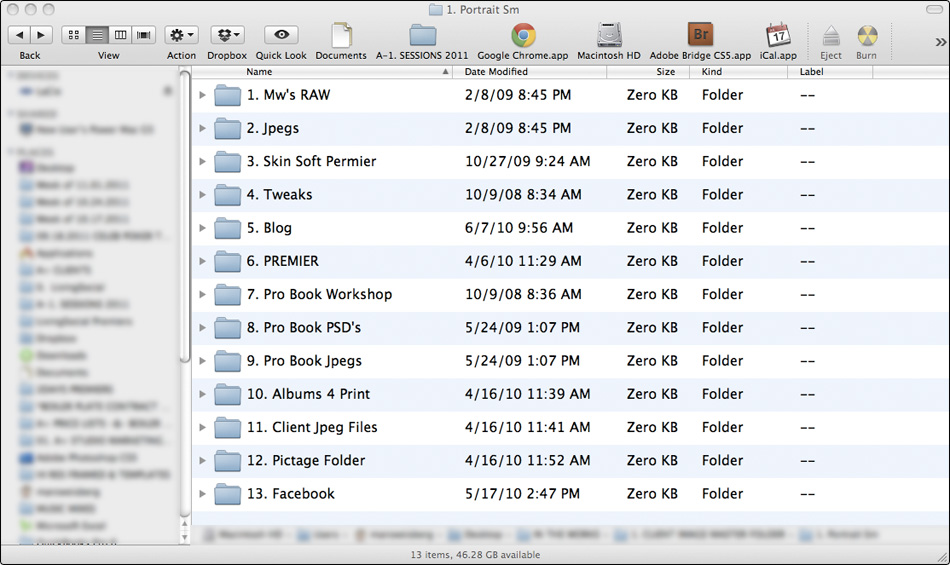
Organizing Your Shoots
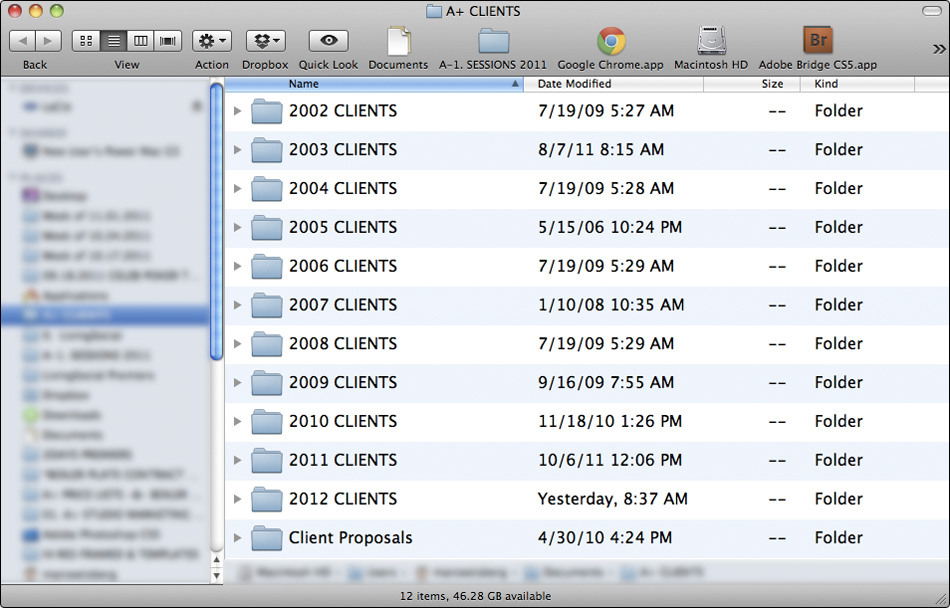
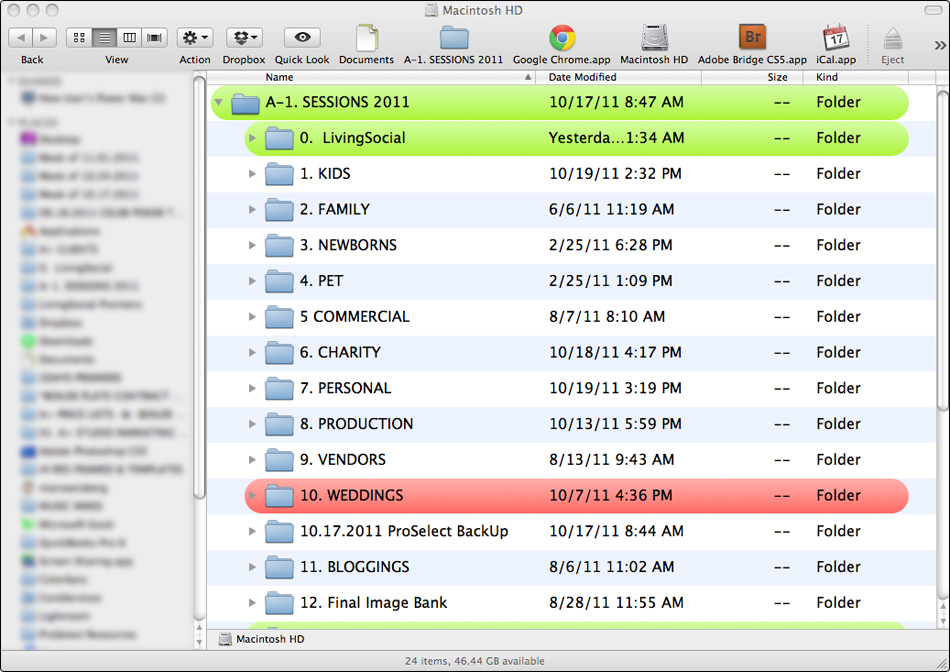
Durring a given year, 2011, 2010, 2009 etc…..we’ll photograph kids, family sessions, weddings, portraits, corporate jobs, commercial sessions, personal work and charity projects. Essentially, a Master Folder is set up for each year with nested folders organized inside to denote the type of shoot. See the screen shot below. As a redundant measure, we use G-Tech drives in the studio to back up all our work: 1tb and 2tb drives. These bullet proof drives are highly dependable, quite and easily storable. They cost a but more than Western Digital and La Cie but are worth it. Peace of mind and reliability trumps price. These drives stay in our studio. For a portable back up drive the La Cie 1tb, Rugged, firewire, 1700 rpm is my choice with blazing fast transfer speeds. This leaves three copies of any given shoot. One on a laptop, another on a G-Tech and a third on a La Cie Rugged. All portrait shoots and wedding shoots are backed up off site on Pictage.
[below] Master Client Shoot folders for the last 10 years.
 k
k
Year 2011 Shoots by Category nested inside the 2011 CLIENTS folder [below]
The same exact scheme is used to organize the studios session each and every year.
Ingesting Your Images
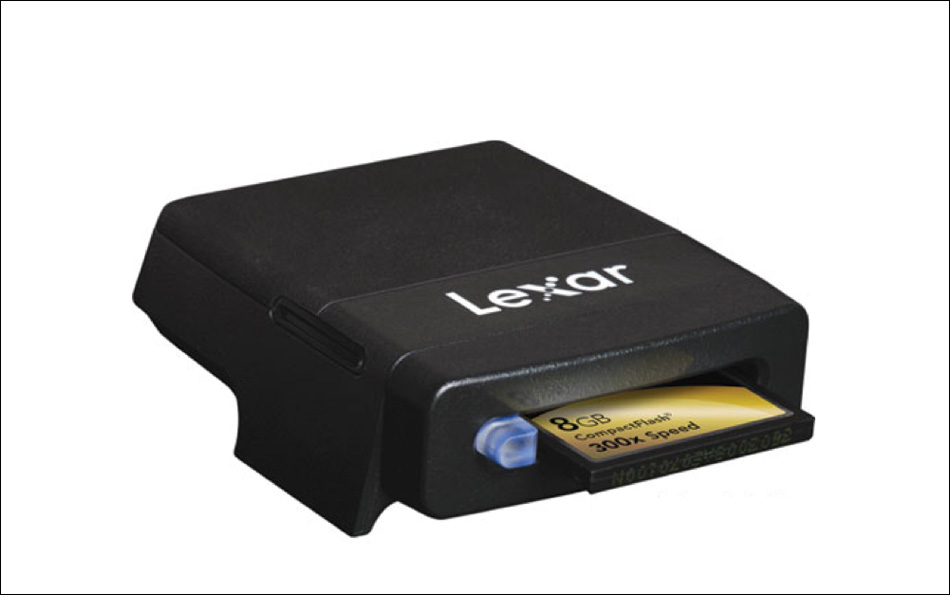
For ingesting images, we use Lexar Pro, stackable, firewire, CF card readers. At our studio all captures are RAW, and the ingesting process moves surprisingly quickly. One reader is stacked on top of another and daisy chained to the next one. You can stack them 5 high or as many as you’d like.
Culling | Photo Mechanic | The Ultimate Professional Workflow Tool | Software on the Planet! Period.
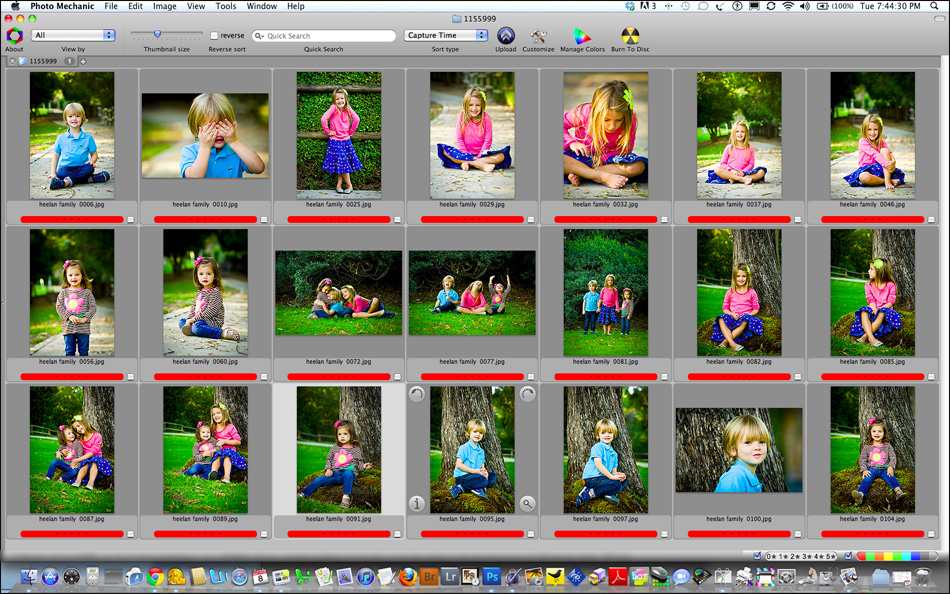
Culling images is fast and easy with Photo Mechanic. This $99 dollar program is amazing. Drag and drop a single file or a file folder onto the icon and Photo Mechanic will creates a temporary catalog of images. P.M. is folder specific and will pull all images from a single folder and create a visual catalog. While it will display almost any type of file, RAW, JPEG with great speed, it chokes when you feed it chunky PSD’s and TIFF’s. If I could change two things about P.M. it would be that 1) PSD’s and TIFF’s would build and display quickly and that 2) Catalogs could be saved.
Other features make this my go-to-culling-software are: a) It is color space specific, meaning that Photo Mechanic will show you true color and you can run inside the color space or calibration space that you’ve specified for your monitor. b) P.M. makes it possible to easily email just about any file type quickly and easily, one at a time or several at a time, in a range of sizes and also includes the capability to watermark your images. Great for client soft copy approval c) File transfers, from one folder to another is drag and drop and wicked fast. d) Culling is simple and accomplished by numeric key color coding or a star system. e) On line documentation is easy to understand. e) Key wording and Metadata is simple and fast. f) The file Renaming feature is lightning fast and can be applied to one or several files. f) P.M. allows for tabbed viewing, making is easy to cull, view or sort through multiple jobs. Honestly there are over a hundred features that make this IMHO the best, fastest and most reliable image browsing software on the planet. At my studio Photo Mechanic is used everyday for every job that we shoot. It is an essential part of our workflow.
Screen shot of Photo Mechanic with some keepers from a recent kids shoot [below]
Getting Ready for Adobe Lightroom 4 Import
After culling images and renaming them in Photo Mechanic they are ready for import into Adobe Lightroom 4. I have three primary Develop Presets that our studio uses. a) High Key for studio sessions shot on our high key white set. b) Grey Background for duhhh, sessions shot on our grey background and …. c) Absolute Auto, which as it implies imparts our secret sauce to all shoots shot outside of the studio. I’ve used a Xrite Color Checker Passport to create our two studio presets. This is also my go to on-site color correction tool when shooting a group of images in Manual mode.
Importing a folder of RAW files into Adobe Lightroom 4 [below]
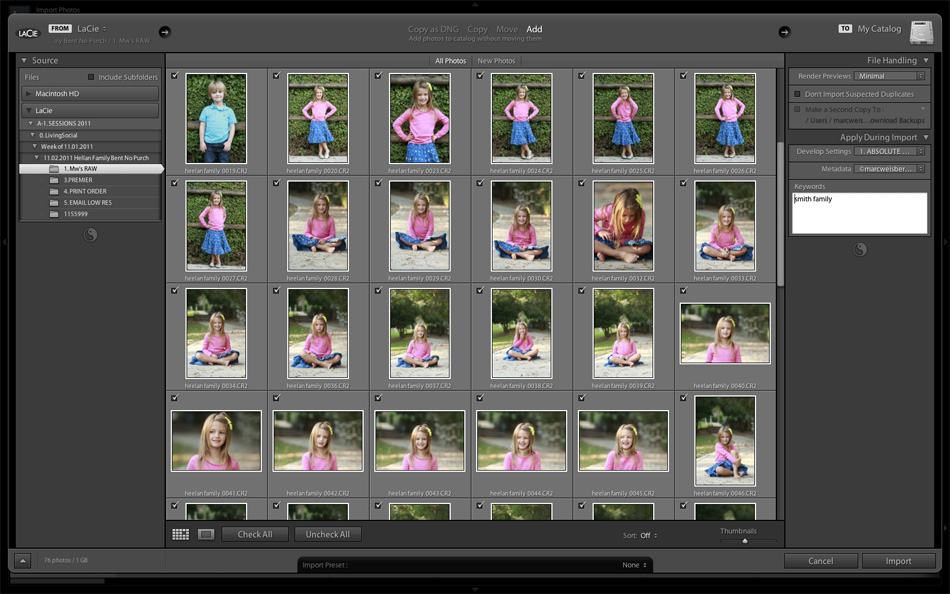
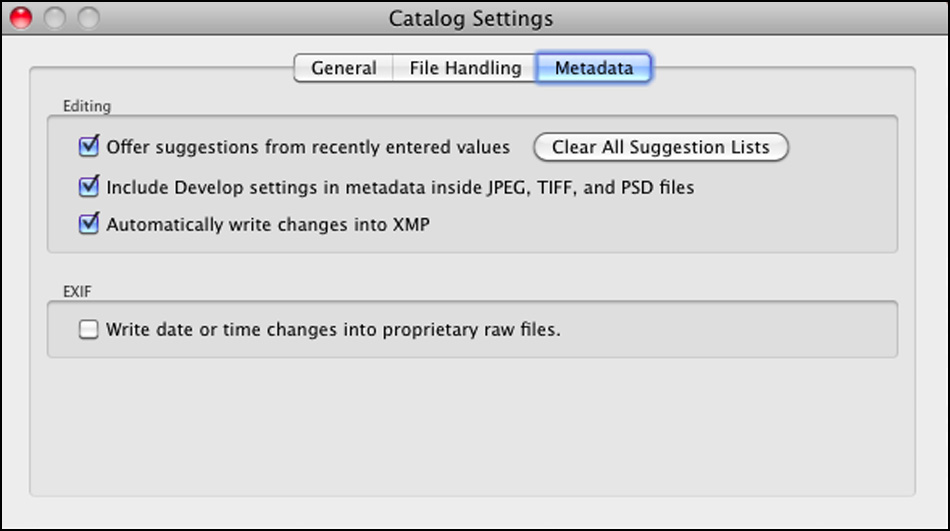
When importing a shoot into LR4 we’ll apply a specific Develop Preset to the shoot. Applying a given preset will give an overall auto-tweak to the RAW images imported. At the same time the RAW files are imported into LR3, XMP sidecar files (these are the data files that store all the little visual tweaks that you’ll be making to your RAW files) are automatically generated in the same folder as the RAW’s. You’ll find this setting in LR at the far left, top of menu bar labeled Lightroom -> Catalog Settings -> Metadata -> all the boxes under Editing are checked. Generating the XMP files allows us to move the RAW folder to any drive while keeping all the metadata changes with it: exposure, density, white balance etc. Due to the size of the RAW folders (in giga bytes anywhere from 1gb-13gb for a wedding shoot) after all the files are completely processed and backed up at least three times on external drives, they are removed from our local machine.
Adobe Lightroom 4 Export
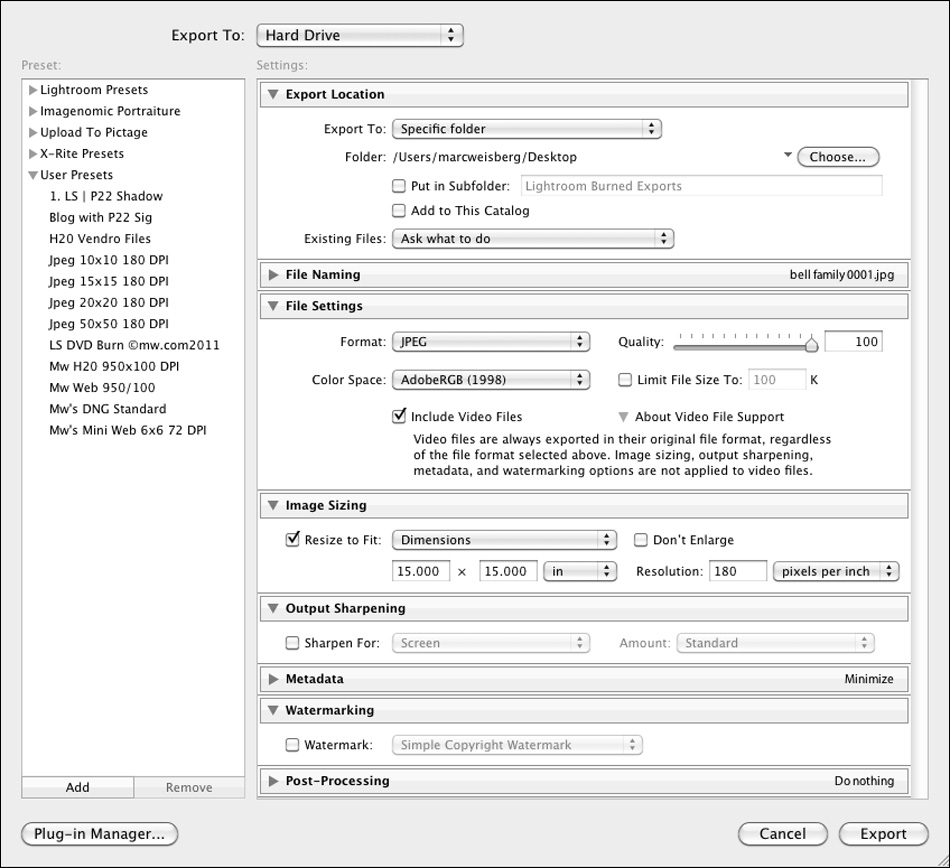
After tweaking, exposure, white balance & density, minimal sharpening and general fine tuning of the RAW images in LR4 the files are renamed starting with the client’s name, a spcae and a numeric starting at 0001, a second time to create a sequential order. Typically some images have been deleted during the tweaking process hence the renaming. We export the majority of our files at 20″x 20″ @ 180 DPI in Adobe 1998 color space. For our workflow this works perfectly for a few reasons. Unless we are printing really large, the 20″x 20″ is perfect for up to a 16″ X 20″ print. If we need to output larger, we’ll go back to the original RAW file and output as close to the print size as possible. After a bit of experimentation, I’ve found that 180 dpi is perfect for output and printing. We’ve printed 40″ and 50″ prints with perfect rendition at 180 dpi in house and through our professional lab partner for years like this with exceptional results. Rezing up to 300 dpi is easily done with no image detail loss should you or you lab require a higher dpi file. Some labs will require sRGB color space instead of the Adobe 1998 color space. This is easily taken care of when exporting from Adobe LR4. Simply chose sRGB: in Adobe LR4, got to File -> Export -> File Settings -> Color Space -> chose the drop down menu and choose you desired color space. The reason for saving files at 180 dpi is to save on hard drive space. A 20″x20″ file at 180 dpi is 13.9 mb while the same file at 300 dpi weighs in at a whopping 38.6 mb! That’s 2.75x as big as its 180 dpi sister. Which is almost a file size thats three times larger! And that my friends will eat up your drives very quickly.
Don’t Fool Yourself | Be Religious About Backing Up Your Work
After each shoot is taken through the full production process {Ingesting/Photo Mechanic/LR4} we do a double back up. One complete copy is stored on a portable 1tb La Cie Rugged that comes home with me each night. A second copy is stored on one of our G-Tech drives. Don’t fool yourself into thinking that your drive is new and it won’t bite the dust. Drives, are mechanical they all bite the dust! Even if you have a SS Drive, it can still die on you. Better to be safe than sorry. CF cards are never, re-formated until a double back up is performed. At this point there are three copies. One on the laptop or desktop, another on the La Cie Rugged and a third on a G-Tech. After we have three copies, the RAW files and the XMP data files are deleted from the local machine. The reason for this is to preserve hard disc space. I’m very comfortable with 2 complete copies of RAW and XMP files.
Adobe CS5 | 16 bit | Photoshop Reinvents Itself
I resisted upgrading from CS4 to CS5 for a while, but am so glad that I did. Firstly, CS5 was redesigned from the ground up in 16 bit. This makes it a speed demon. It is radically faster than CS4. Secondly, there are some neat new tools that speed me through the entire retouch process. A few that I really like are a) the new non-destructive Sharpen Tool in the tools palette lets you can vary the Strength of sharpening, Protect Detail and even select the layer or layers that you’d like sharpened. As with any tool less is more. I always build up and prefer working with masks so I can go back an paint out any undesired affect. b) the new Spot Healing Brush….it just works. c) the new Patch tool with Content Aware Fill. Takes a bit of experimentation at first but it’s s huge time saver too. d) the Warp tool located under Edit -> Tranform -> Warp -> in most instances it is my go to slimming tool and easier to use than Liquify. e) The new Quick Selection Tool is insanely accurate and fast. I use the Quick Selection Tool for selecting objects or people as a precursor to creating masks in tandem with the Refine Edge radio button located to the right of the {checked} Auto-Enhance box. CS5’s ability to create complex Masks using Refine Edge is nothing short of a mind blowing miracle and makes it easier than ever to create complex Masks that would have perviously taken hours to do.
Action Jackson
I’ve developed allot of my own Adobe Photoshop actions over the years. Thankfully I’ve been able to transfer all of them over to new versions of Photoshop and IOS updates, with the exception of my Droplets in the latest iteration of the IOS Snow Leopard the Droplets wouldn’t transfer. When i first started my foray into digital photography i used way to many actions. I’m more of a purist so to speak these days. Most of my color and black & white conversions come directly from Adobe LR4, from presets I’ve developed. I do my own retouching an enjoy it in small doses. My primary uses for Adobe CS5 are: a) cleaning up eyes, removing blemishes, softening skin, final sharpening and saturation adjustments as well as vignetting. However, most of my vignetting is taken care of in LR4. These days I only use a handfull of actions. I prefer to spend my time photographing and currently have about 15 commissioned shoots per week. So my time is very valuable. The only time images are art-worked is for an album, a final print and for our blog. Another words, anything we show for preview or as a proof is non-art-worked and 95% perfect with excellent exposure, color, density and sharpness. That extra 5% CS5 boost that goes into our photography really makes it pop!
Final Thoughts
Workflows are like opinions and elbows, everyone has onw. I think what’s make our workflow a bit different is that it’s been tried, tested and perfected over several years. Currently my studio is photographing about 15 family portraits and 1 wedding a week. And the workflow is easy and painless. In 2007 we were an early adopter of Adobe Lightroom. LR has eased the studio’s workflow, streamlined postproduction and saves us 100’s of hours of computer face time.
This Workflow system is highly organized and is easily taught to a studio manager or intern. It has redundancy and safeguards built into it. To start a new job all you need to do is copy and paste a Studio Master folder with its nested contents into a given year and type of shoot and re-title the folder with the date and client’s name and your are ready to go. For our weddings, after a full tweak in Lightroom, images are again culled in Photo Mechanic and then imported into ProSelectPro where album design will start. The same final process is used for our blog posts. After output in ProSelectPro, retouching is done in CS5 for albums and montages. Single images and wall portraits are output from Lightroom and then artworked in CS5. If we need to a test print, it is made on our in house Epson 3880 before a large canvas or wall print is produced.
CONTACT MARC
VIEW FAMILY PORTRAIT PORTFOLIO ~ VIEW NEWBORN PORTFOLIO
VIEW ENGAGEMENT PORTFOLIO~ VIEW WEDDING PORTFOLIO
Marc Weisberg | Marc Weisberg Photograhy Blog
Marc Weisberg Fashion Photography | Orange County Wedding Photographer
Newport Beach Portrait Photographer | Los Angeles Wedding Photographer
Orange County Newborn Photographer | Destination Wedding Photographer

